
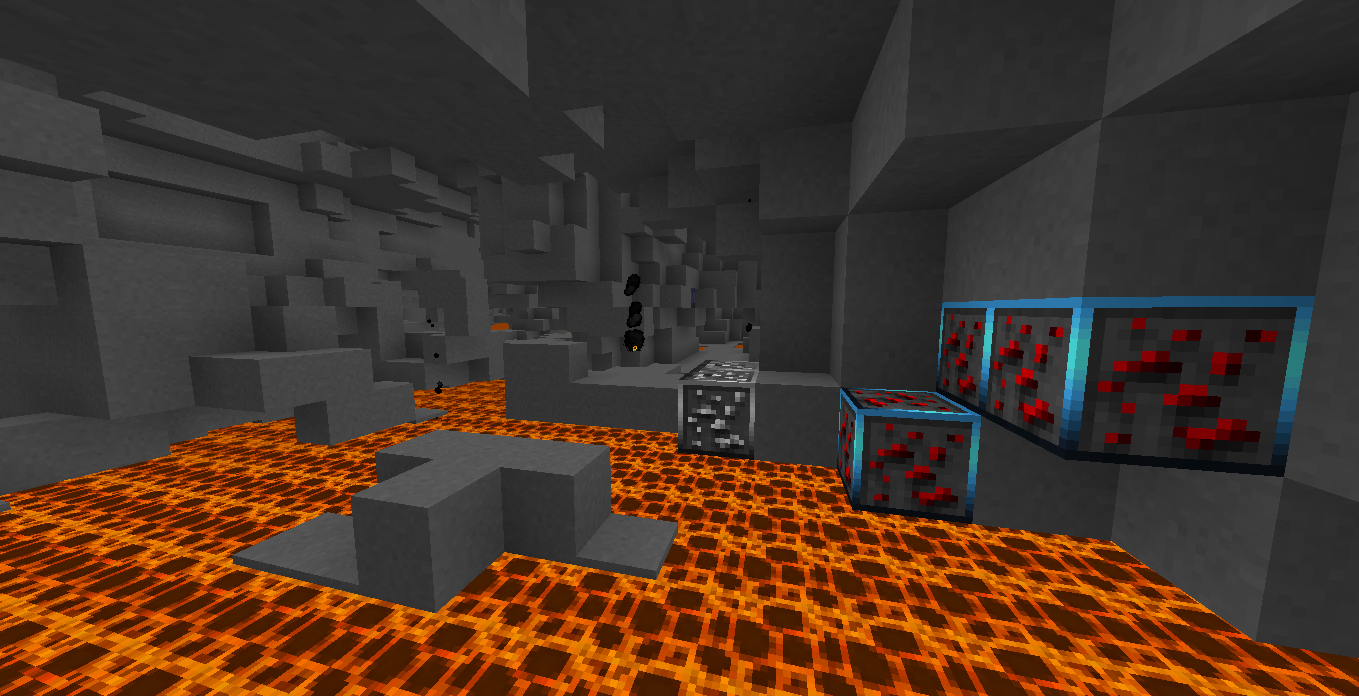
A modality where you start in a normal world with a large number of players spawned in random coordinates, you must survive and equip yourself the best possible !, life does not regenerate by itself, the only way to recover life is with golden apples, the edge Starts moving from minute 55, then every 5 minutes will be reduced to 25x25 deathmatch, the last player alive is the winner!

→ Save statistics in MySQL! (It is mandatory to have MySQL!).
→ Bedrock border 1.7 (Like big networks).
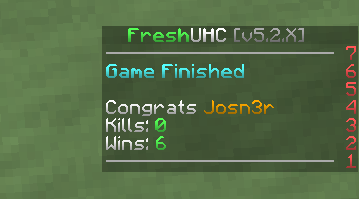
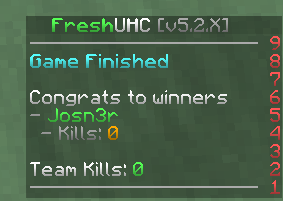
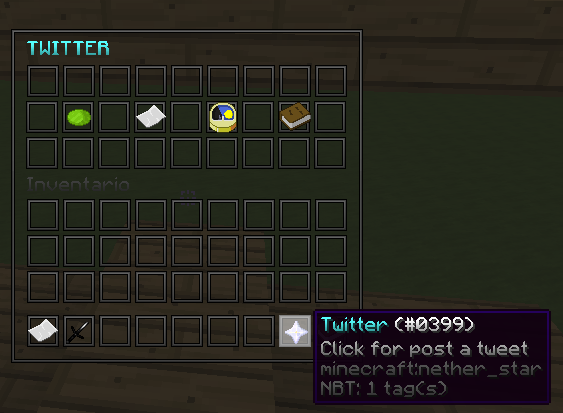
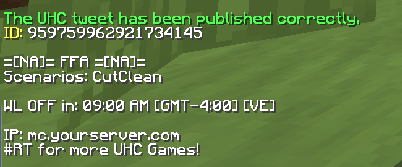
→ Integrated Twitter API. for POST UHC, Winners and Team Winners!
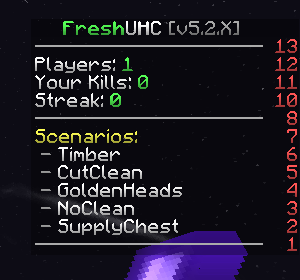
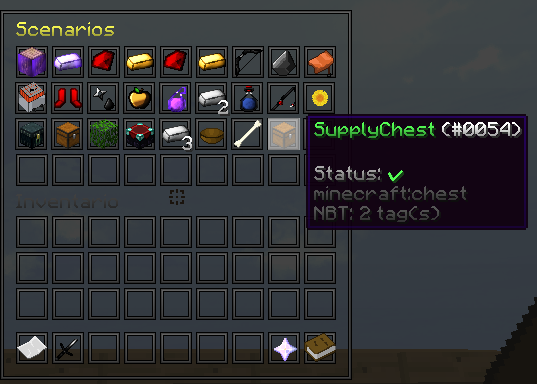
→ 26 Scenarios available.
• CutClean
• DoubleOres
• TripleOres
• Timber
• DiamondLess
• GoldLess
• BloodDiamond
• BloodGold
• Bowless
• VanillaPlus
• Horseless
• Timebomb
• NoFall
• Fireless
• GoldenHead
• NoClean
• Absorptionless
• Rodless
• LuckyKill
• LuckyLeaves
• Backpack (Only for teams)
• ExtraInventory
• NoEnchant
• Soup
• Barebones
• SupplyChest
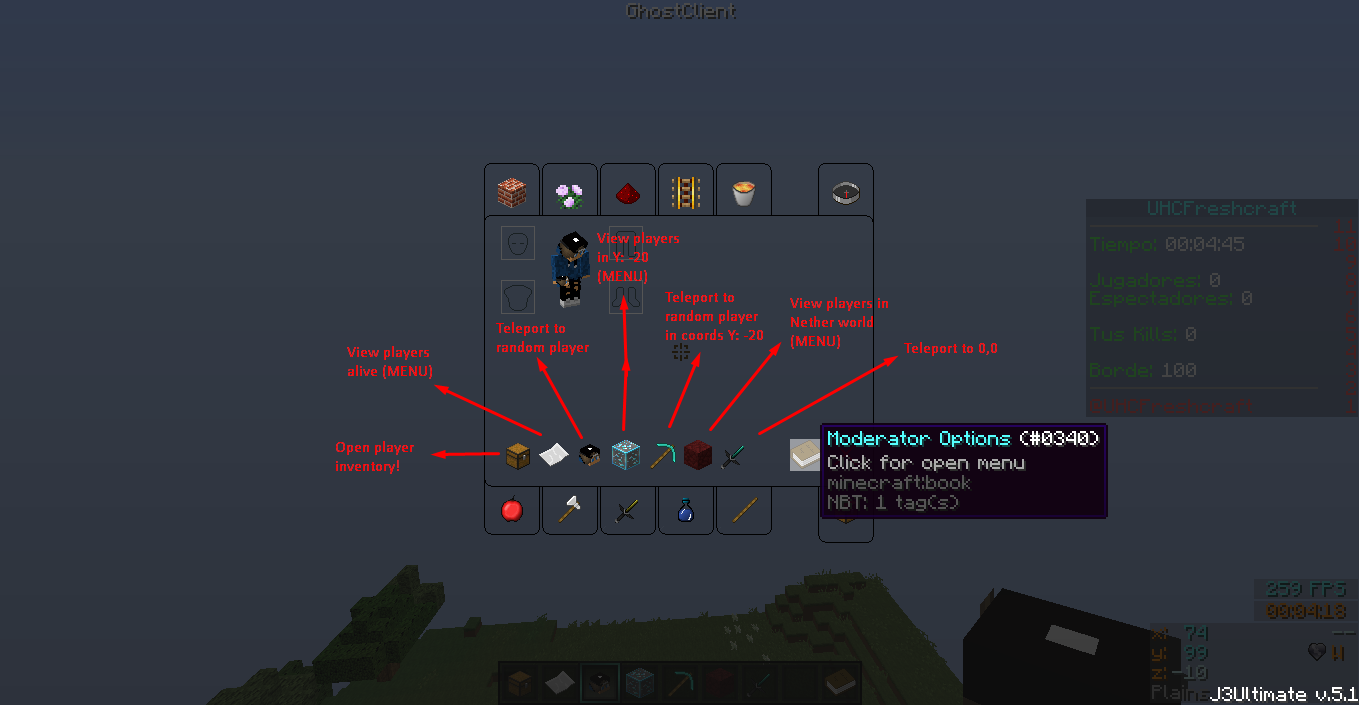
→ Staff Mode UHC integrated!
→ PreLoading chunks arena optimized!
→ Messages/Scoreboard/Configuration 100% customizables!
→ PreWL and PosWL support!
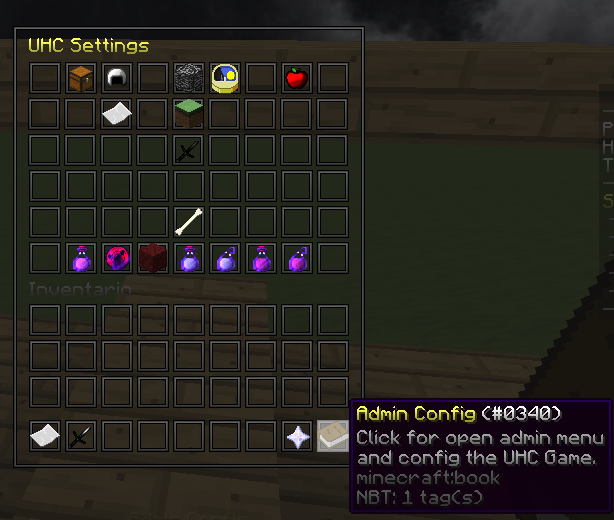
→ Configuration in-game via menus!
→ Twitter post vía Menu!
→ Practice
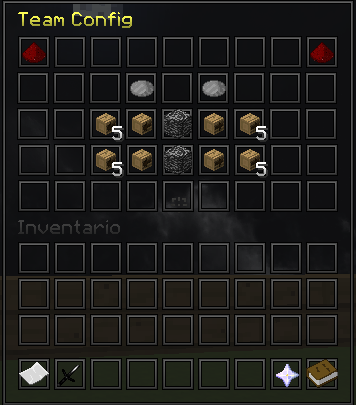
→ Best teams system (Like big networks!)
→ Freezer system.
→ CombatEntity (Villager NPC)
→ CombatTag integrated!
→ Shears support!
→ Config Strength Lv1, Strength Lv2, Speed Lv1, Speed Lv2, Enderpearl Damage and more!
→ Game rules broadcast configurable!
→ Custom Starter KIT (temporaly or permanent!)
FreshUHC has been tested in FluctisHosting
Budget package 6GB RAM.
Version: v5.2.7
297 PLAYERS (BOTS) + 3 REAL PLAYER
Min TPS: 19,41
Max TPS: 19.95

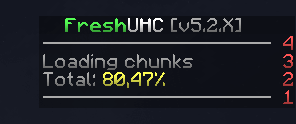
LOADING CHUNKS
WAITING

PRACTICE
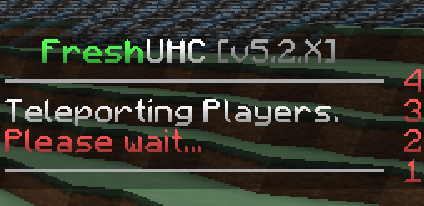
TELEPORT
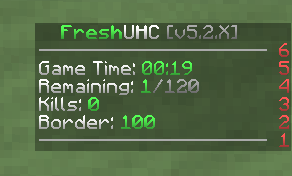
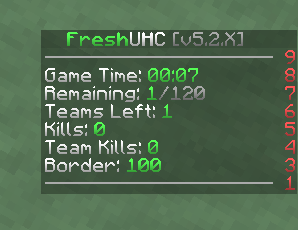
SOLO GAME
SOLO WIN
TEAM GAME
TEAM WIN


All dependencies that are left below are completely mandatory! If you do not have any of the dependencies the plugin will not be able to walk properly!
System:
→ Java 8.
→ MySQL Database (REQUIRED)
→ Download Spigot v1.7.10 or v1.8.8.
» Click here for download SPIGOT v1_7_R4 «
» Click here for download SPIGOT v1_8_R3 «
Plugins:
→ MultiverseCore (Click here) (Recomended)
→ TerrainControl (Recomended)
» Click here for download TerrainControl 1.8.8
» Click here for download TerrainControl 1.7.10
Pre-Configurations:
→ TerrainControl Pre-configuration (Recomended)
• Caves 6.0
• Biomes configurated
» Click here for download PreConfigurated TerrainControl.

• Installing the plugin:
1) Buy and download the plugin.
2) Download the dependencies that were left in the post!
3) Place the plugin and its dependencies in the "/plugins/" folder.
• In-game plugin configuration:
Then you should follow each step for the plugin to work properly, if you make mistakes in one repeat steps! Read it carefully
1) Start the server to create the config.yml file and then close it. (If it is the first time you install it, it will close automatically)
2) Open the UHC config.yml and configure your MySQL database, remember to put the data well. (As advice, the 'port' of MySQL does not change)
3) Once the database is configured, you start the server again and wait for it to start correctly, if so, you can proceed to translate and configure the rest of the plugin, if it does not start and stop again, check to place the database well .
4) When you have everything configured to your liking, enter the server and set a spawn, otherwise the players will be typed to random coordinates, for this we will use the command: /setspawn.
After all that, we will have correctly configured our UHC-Host server, if you have problems in the installation you can ask for support, above you will see how!

How to configure PRACTICE arena:
To be able to configure the Practice arena, it is very easy.
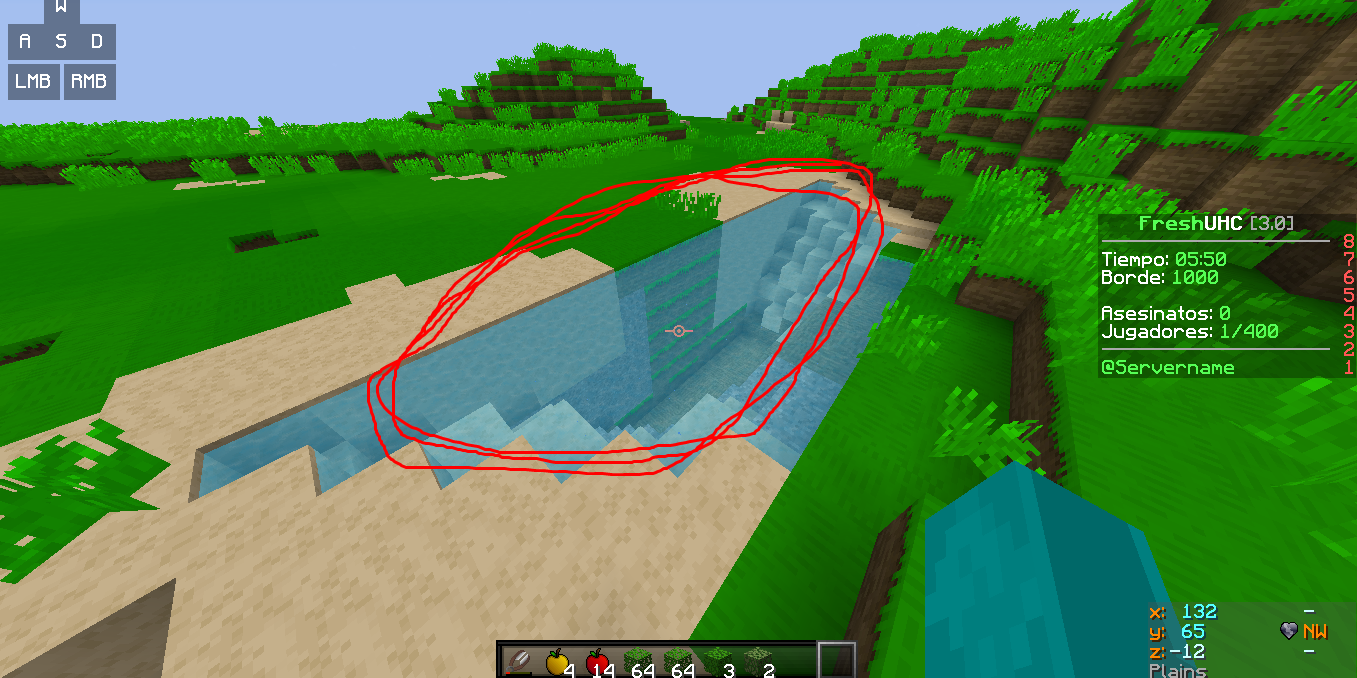
As a reminder, teleportation to the arena of practice is RANDOM, it teleports in a 90x90 radius starting from the center that is X: 0 and Z: 0.
In short, you must place a border using WorldEdit from the X: 100 and Z: 100 coordinates to the X coordinates: -100 and Z: -100, it is recommended that the edge has a height greater than 20 blocks.
If the arena of practice is already created.
1) Open the config.yml, and look for the "practice" section, once you find it where it says "world" place the name of the world where the PRACTICE arena is.
2) Once you have done those steps, you will have the Practice configured ready, you only have to activate it and the users can enter to practice.
If the arean de practice is not created
1) Using the MultiverseCore, create a world with the name "Practice".
2) Once the world is created, place an edge in a radius of 100x100 using the WorldEdit, The edge from starting from X: 100 and Z: 100 to X: -100 and Z: -100. It is recommended that the edge be of Bedrock and have a height of 20 blocks.
3) Once you have done those steps, you will have the Practice configured ready, you only have to activate it and the users can enter to practice.
How to configure KITS:
To be able to configure the KITS, it is very easy.
There are two options for the initial kit when configuring it.
First we have to configure the kit PERMANENTlY, which in doing so will save the configuration in the file "starter.yml", this kit will be delivered in all the UHC games when starting.
On the other hand we have to configure the kit TEMPORARILY, which will allow that kit is only available in the game that is going to host, once it finishes it will be automatically deleted. (Special for events types BUILDUHC)
UHC GAME KIT:
1) To start modifying the kit, first we have to give us the default kit, for this we will use /kits edit STARTER.
2) Once we have the starter kit, we will start to remove the items we want to add from the creative, they can add enchantments using the /enchant command that minecraft has available. On the other hand the armor can be placed directly, so that when you deliver the kit is equipped automatically.
3) When we have our new kit ready, we proceed to save it. Remember that there are two types of kits, temporary and permanent, to see how each one works above you will find an explanation.
To save PERMANENTLY, we will use the command /kits save STARTER false
To save TEMPORARILY, we will use the command /kits save STARTER true
4) And with that we have already configured our initial kit.
PRACTICE KIT:
1) To start modifying the kit, first we have to give us the default kit, for this we will use /kits edit PRACTICE.
2) Once we have the starter kit, we will start to remove the items we want to add from the creative, they can add enchantments using the /enchant command that minecraft has available. On the other hand the armor can be placed directly, so that when you deliver the kit is equipped automatically.
3) The difference between PRACTICE and STARTER, is that practice does not have to keep temporary kit, so we can only save PERMATELY, for this we will use /kits save PRACTICE false
4) And with that we have already configured our practice kit.
How to configure TwitterAPI:
To be able to configure the Twitter API, it is very easy.
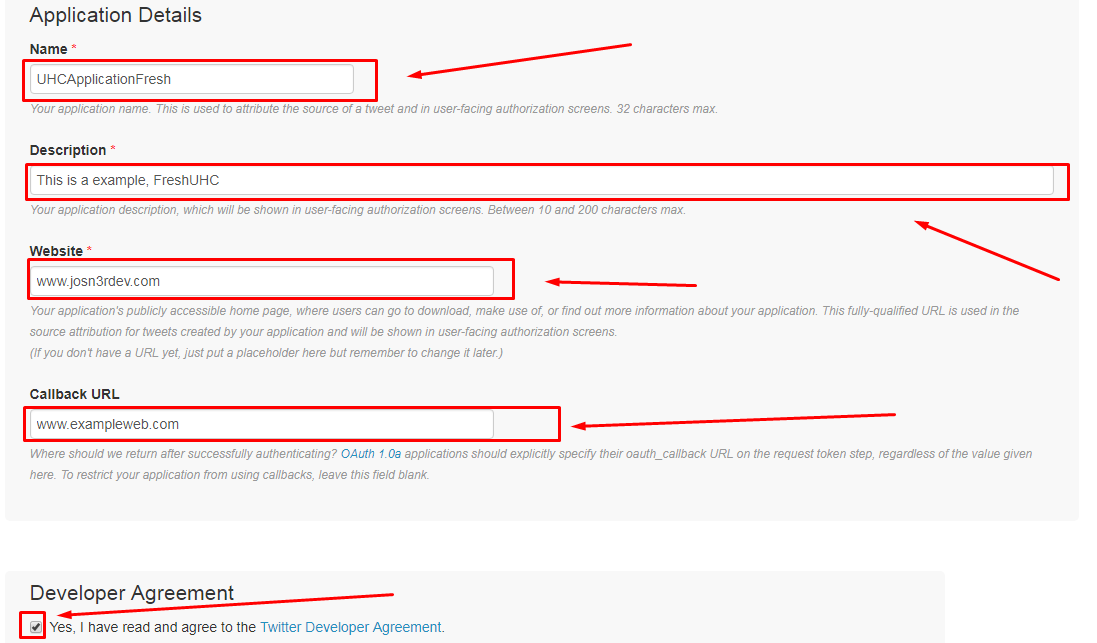
1) We must enter the Twitter account where the UHC will be published.
2) We enter to: https://apps.twitter.com/
3) Once inside the Apps page, we will create a new App.
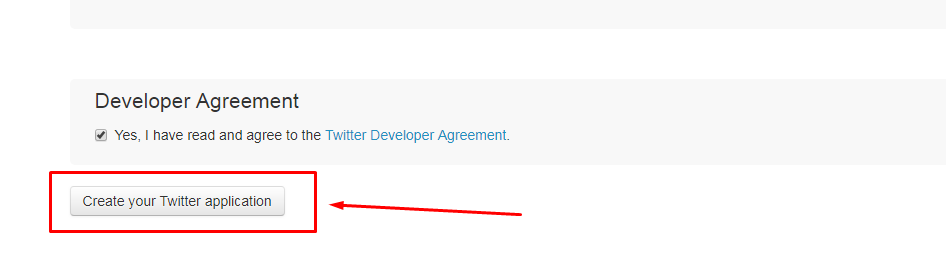
4) We will fill in the fields that you request and we create the application
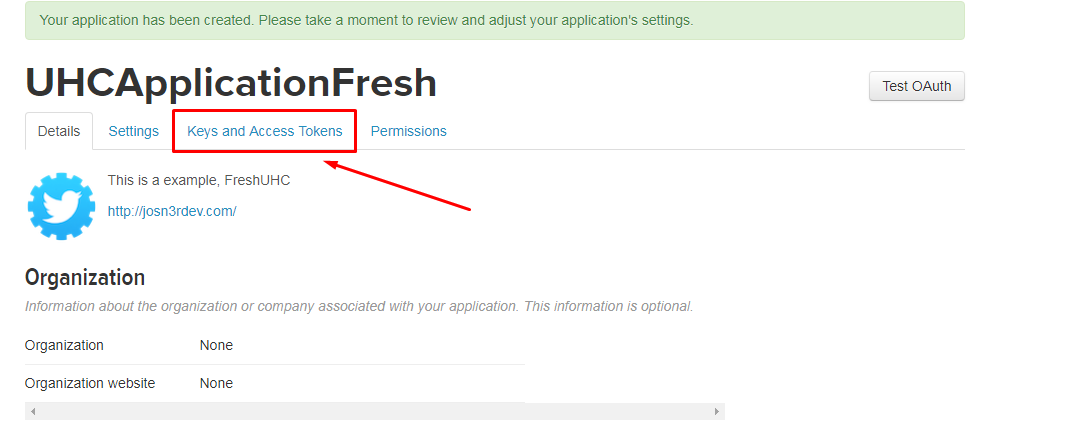
5) Once the application is created, we go to Keys and Access Tokens
6) We will copy the Consumer Key and Consumer Secret to the Twitter configuration
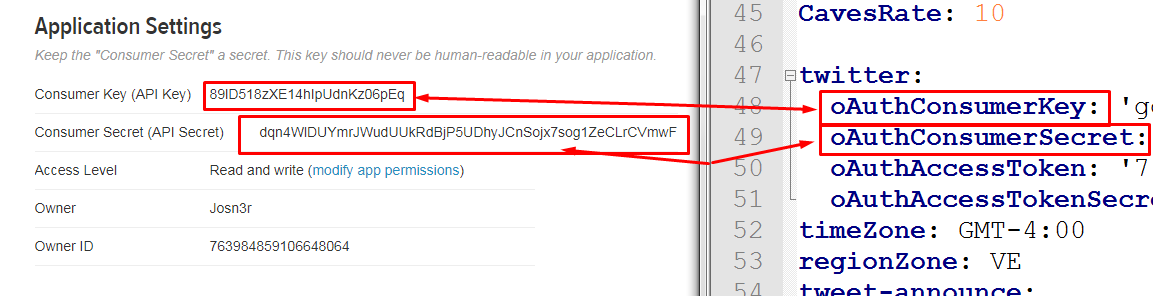
7) We go below, and we will create our Access Token.
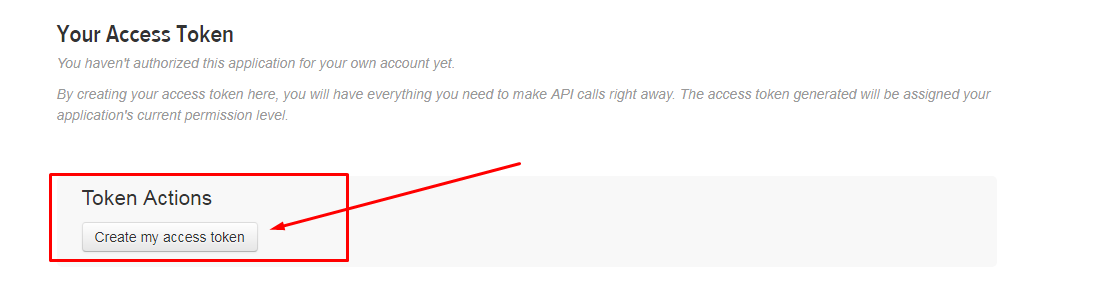
8) Once we have created our Access Tokens, we will copy and paste them into the Twitter configuration.

And voila, we will have configured the Twitter API in our UHC.

• Commands & Permissions:
→ /uhc ↔ uhc.admin.
→ /edit ↔ uhc.admin.
→ /start ↔ uhc.admin.
→ /kits ↔ uhc.admin.
→ /stats ↔ none.
→ /setmod ↔ uhc.admin.
→ /staff ↔ uhc.command.staff.
→ /extrainv ↔ none.
→ /giveall ↔ uhc.admin.
→ /mutechat ↔ uhc.command.mutechat.
→ /respawn ↔ uhc.command.respawn.
→ /sethost ↔ uhc.admin.
→ /speckick ↔ uhc.admin.
→ /whitelist ↔ uhc.admin.
→ /vipwl ↔ uhc.command.vipwl.
→ /border ↔ uhc.command.border.
→ /helpop ↔ none.
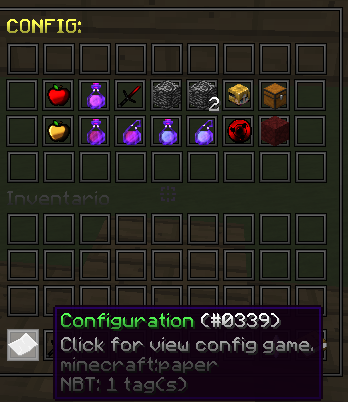
→ /config ↔ none.
→ /scenarios ↔ none.
→ /practice ↔ none.
→ /removehost ↔ uhc.admin.
→ /removemod ↔ uhc.admin.
→ /addspec ↔ uhc.admin.
→ /rescatter ↔ uhc.command.rescatter.
• Others Permissions:
→ uhc.helpop.receiver ↔ for receiver help messages
→ uhc.whitelist.bypass ↔ for bypass whitelist (Only if there is 1 host.) (PreWL)
→ uhc.poswl.bypass ↔ for join PosWL (Only the first 15 minutes of play!).
→ uhc.antispam.bypass ↔ Bypass anti-spam.
→ uhc.chat.bypass ↔ Bypass mutechat.
→ uhc.joinFull.bypass ↔ for join with arena full.
→ uhc.joinInGame.bypass ↔ for join with arena in game.
→ uhc.teamfull ↔ for bypass max-players per teams!
→ uhc.teamName.color ↔ for add colors to your team name!
→ uhc.spectator.bypass ↔ For spectate with DeathKick enable.

")
